Contour Scanning powered by Focus Probing Technology
New Feature for µCMM and InfiniteFocus G6
Experience a new era of efficiency and flexibility with contour scanning, an additional application of Focus Probing technology! With significantly increased speed and ease of use as well as extensive automation options, scanning contours is now even faster and more intuitive.
Benefit from:
Flexible Contour Scanning of Larger Areas: Now you can easily and intuitively capture metrically correct contours on larger areas.
Intuitive Operation Using Waypoints: Define scan areas using waypoints with just a few clicks in the live view.
Automatic Illumination: Using Focus Probing technology, scans are performed along the defined path using optimized illumination settings automatically.
Process Simulation for Optimization: Visualize the measurement process in advance and make flexible adjustments.
Automatic and Robust Data Acquisition: Just click on "Start" and get robust data that integrates seamlessly into your measurement plan.
Full Control with CAD Transparency
Gain full control over your 3D view with the new transparency feature for CAD data. Use the "eye” symbol to flexibly show and hide CAD models and adjust the transparency value as you like. Decide for yourself whether you want the CAD model to be visible or to fade into the background, or display only the elements that are relevant for your measurement. This allows you to optimize your view and simplify the analysis directly in the 3D viewer.
Global Keywords: Flexible Management of Projects & Reports
The new global keyword management offers you maximum flexibility and control over your projects and reports. By customizing global keywords to your needs, you retain control over which keywords appear in your reports and where they are stored. Use global keywords across projects – once defined, they are available in all projects. This saves time and ensures consistent terminology!
More Versatility through Automated Data Processing
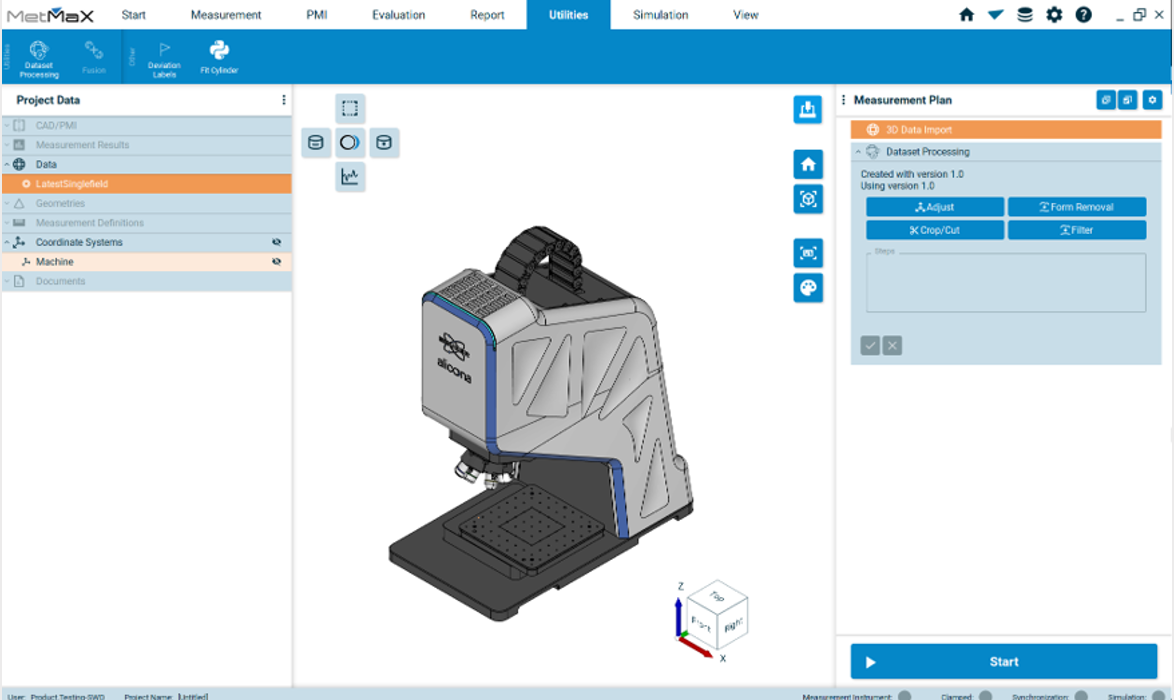
Use powerful tools such as ‘Adjust’, ‘Crop/Cut’, ‘Form Removal’ and ‘Filter’ to customize and process your data even more effectively. These commands are automated directly in the measurement plan. After processing, the data is saved automatically and can be easily used for further evaluations. This saves you time and allows you to make your processes even more efficient.
Maximum Reliability for Your Measurements with Project Specific Hardware Grips
With MetMaX 4.5, you only need to teach in the sample holder once in the clamped position. The sample holder automatically remains in position for all subsequent projects. In addition, you can select sample holders separately for different projects – this reduces the workload and increases efficiency. MetMaX warns you immediately if the position of the sample holder has not yet been taught in. This helps to avoid unprepared usage and ensures maximum safety.


