Revolutionising Quality Control: Turning The Ideal Into Reality
In manufacturing, achieving perfect quality control has always been an idea, until now. With rapid advancements in 3D scanning technology, industries can transform their quality control (QC) processes from reactive to proactive, ensuring precision, efficiency, and reliability at every stage.
The Challenges Of Traditional Quality Control
Manufacturers have relied on conventional QC methods such as coordinate measuring machines (CMMs), manual inspections, and calipers for years. While effective, these approaches come with significant drawbacks:
Time-consuming: Traditional inspections slow down production lines.
Limited flexibility: Fixed measurement setups restrict adaptability.
Operator dependency: Manual errors and inconsistencies can impact accuracy.
These limitations create bottlenecks, making maintaining high efficiency while ensuring product quality difficult. Fortunately, new solutions are bridging the gap between ideal and achievable quality control.
How 3D Scanning Is Transforming Quality Control
3D scanning technology is revolutionising QC by offering a fast, flexible, and highly accurate alternative to traditional methods. By integrating portable 3D scanners and automated metrology solutions, manufacturers can:
Enhance Accuracy: Capture millions of measurement points in seconds, ensuring micron-level precision.
Speed Up Inspections: Reduce measurement time significantly while maintaining high reliability.
Improve Flexibility: Scan complex shapes and surfaces without needing fixed setups.
Enable Real-Time Analysis: Compare scanned data against CAD models instantly, allowing for immediate adjustments.
From Ideal To Reality: Implementing A Smarter QC Process
Modern 3D scanning solutions make it possible to shift from reactive quality control to a predictive, data-driven approach. Companies adopting this technology experience:
Reduced Scrap & Rework: Early defect detection prevents costly material waste.
Greater Production Efficiency: Faster inspections keep production lines moving without delays.
Enhanced Product Consistency: Automated, repeatable measurements ensure uniform quality.
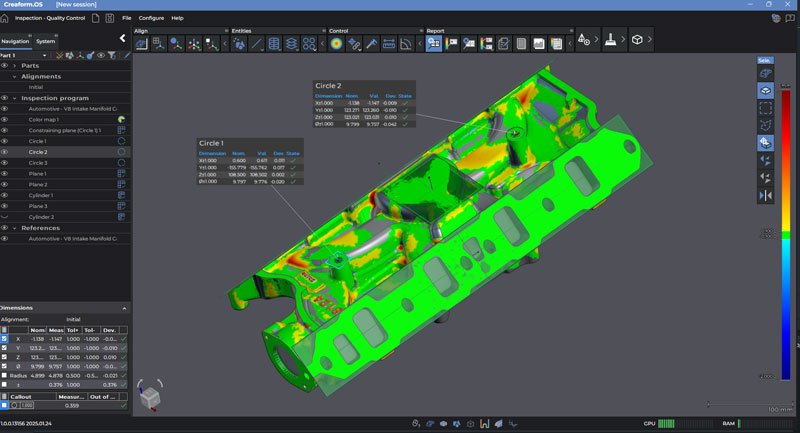
With Creaform.OS and the Creaform Metrology Suite, the path to identifying root causes is straightforward. QC specialists can quickly determine whether issues arose during data acquisition. With greater confidence in their results, they can delve deeper into analysis and troubleshooting. This eliminates any doubt about whether the operator improperly inspected the part.
The Future Of Quality Control Is Here
With 3D scanning technology, the manufacturing industry is setting new standards in quality assurance. The shift from traditional QC to smart, automated metrology is no longer just an ideal, it’s a reality.
Are you ready to elevate your quality control processes?
MSL provides cutting-edge 3D scanning solutions designed to streamline inspections, boost productivity, and ensure unparalleled precision.
For more information: www.measurement-solutions.co.uk


