Marine Engineering: 3D Scanning Solution for Ship Turbine Blade Inspection and Product Development
Written by SCANTECH 3D
The marine engineering industry plays a crucial role in global transportation and commerce, focusing on the design, development, and production of boats, ships and other marine vessels.
Within this sector, a key area of expertise involves the production of ship engine components, such as turbine blades.
The blade is the turbine’s most critical aerodynamic component, significantly impacting its efficiency. It’s essential to thoroughly inspect blade characteristics during the design stage.
Blades are meticulously engineered to optimize airflow and maximize efficiency, with their shape and profile designed to create a high-pressure region on one side and a low-pressure region on the other.
Ship Component Manufacturer
Our client is a leading player in the marine engineering field, specializing in the research and development of ship-related products.
Their primary offering includes high-performance ship engine blades. However, they face significant challenges in the inspection and quality control processes, particularly concerning the scanning and measurement of turbine blades.
Features of the Turbine Blade to Be Inspected
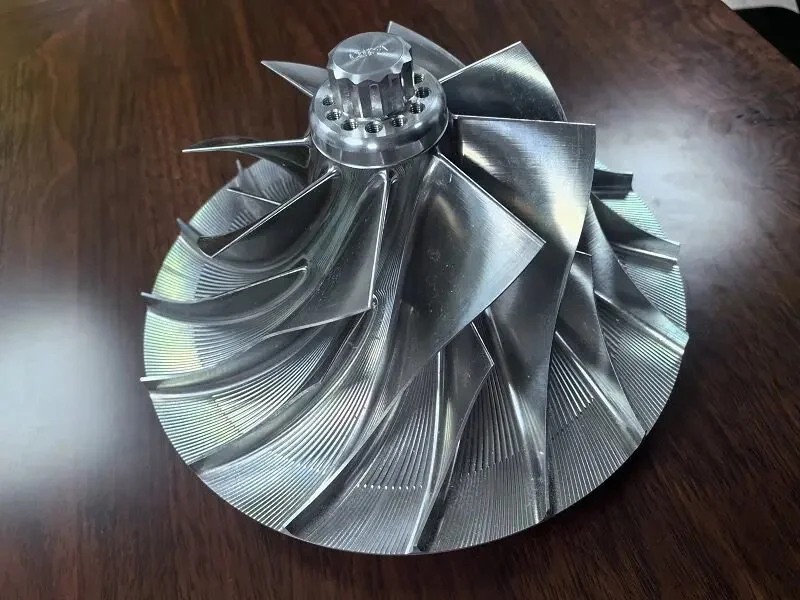
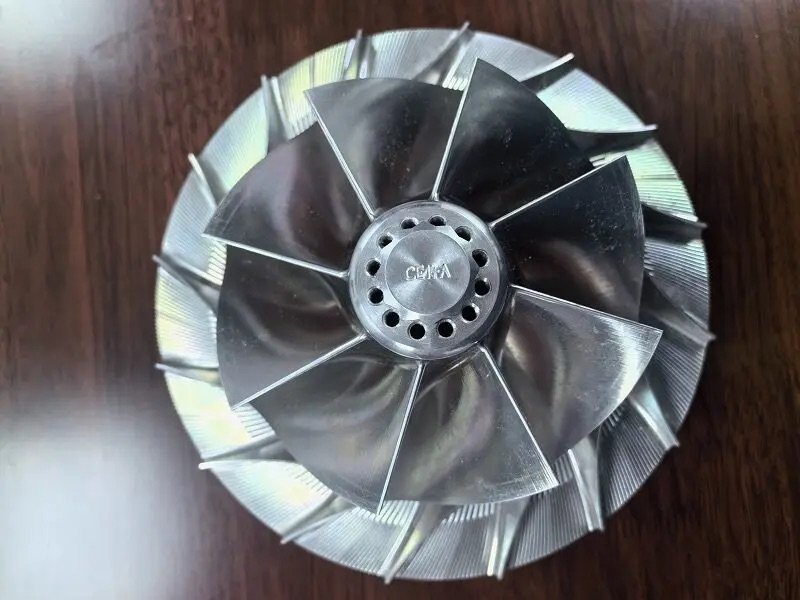
The turbine blades produced by our client are typically made from aluminum and exhibit unique geometrical characteristics, with a thickness ranging from 1 to 2 mm and sharp edges that need to be accurately represented. These features are crucial to ensuring the overall quality of the final products.
Challenges of Measuring Complex Turbine Blades
Measuring turbine blades presents significant challenges due to their thin-walled and complex twisted surfaces. The shiny aluminum finish causes light reflection, which can interfere with accurate data capture.
Intricate details, such as machining marks and sharp corners, further hinder the process. For instance, the manufacturer used to scan the angled surfaces of the blades, but they struggled to capture these areas accurately, leading to rounded edges instead of the sharp corners they wanted.
Additionally, traditional scanning methods used by our client have proven inadequate, leading to incomplete data capture and inaccuracies, especially in hole positions.
The older red-laser technology often required powder coating to improve scanning. This situation underscores the need for more advanced measurement solutions for these complex components.
Scantech’s 3D Solutions for Product Development and Inspection
To address these challenges, we introduced our advanced scanning solution: the SIMSCAN 42.
SIMSCAN, a portable palm-sized 3D laser scanner designed for capturing hard-to-reach areas and narrow spaces. With a sturdy full-metal housing, it delivers reliable performance and has received prestigious awards like the German Red Dot Award and the China Design Silver Award.
The SIMSCAN excels in high-quality 3D scanning, enabling users to quickly and accurately capture intricate details of both narrow spaces and large-scale components.
Additionally, Scantech offers wireless SIMSCAN-E, which enhances flexibility and ease of use, making it an ideal metrology-grade measurement instrument for various applications.
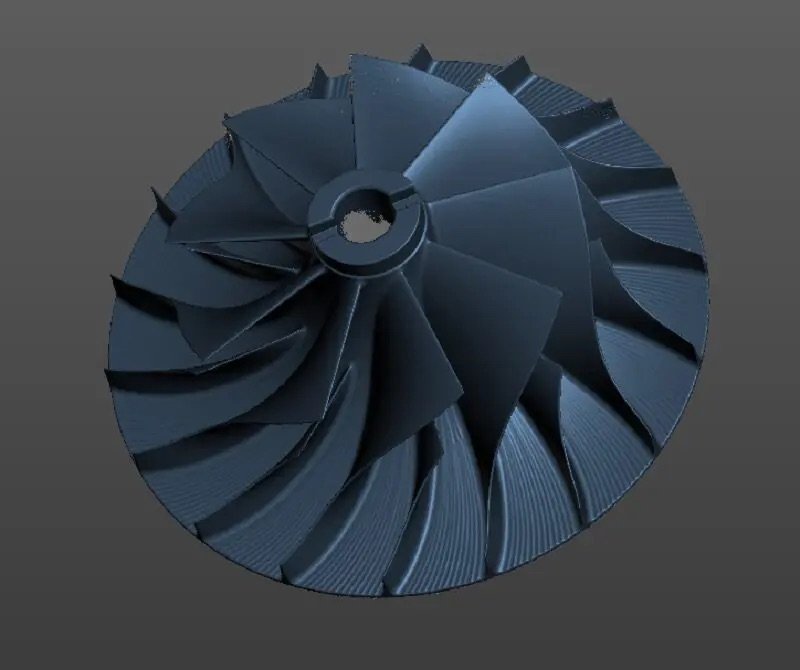
Scantech’s 3D scanning technology helps the user to obtain full-field and precise 3D data of turbine blades for product development and inspection.
3D scanning allows the company to quickly create accurate digital models of existing parts. This accelerates the prototyping process, enabling teams to iterate designs based on precise data without starting from scratch.
High-tech 3D scanning also provides detailed measurements of parts, enabling thorough quality assessments. By comparing scanned data against design tolerances, the manufacturer identifies defects or deviations in real time, ensuring only products that meet quality standards are delivered.
The 3D scanner combined with advanced software brings numerous benefits:
Enhanced Precision: The blue laser technology significantly improves scanning accuracy, enabling precise capture of fine details, including sharp edges and intricate geometries with an accuracy of up to 0.020 mm.
Material Compatibility: The SIMSCAN 42 handheld 3D laser scanner ‘s advanced settings, including adjustable exposure and a bright mode, allow it to scan shiny machined surfaces effectively without the need for additional coatings.
Effective Hole Scanning: Compared to its competitors, the SIMSCAN features a shorter camera distance of 130 mm, allowing for a steeper viewing angle when 3D scanning narrow spaces.
This design enables the SIMSCAN to capture accurate and complete data in hard-to-reach areas, such as deep grooves, ensuring users can obtain full-field data effectively.
With the capability to scan close distances and complex geometries, the SIMSCAN ensures comprehensive data capture, even in hidden or challenging areas.
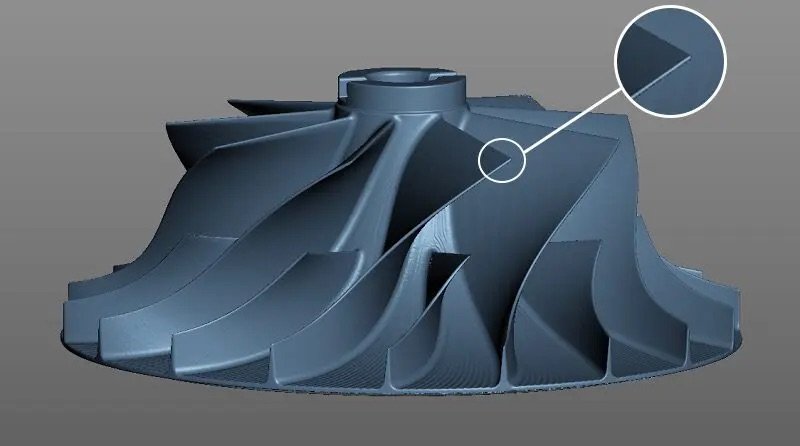
Thin-Walled Feature: By adjusting point density settings, the device can effectively capture the details of thin edges and corners, fulfilling the client’s requirements for product development and quality assurance.
Efficiency: Thanks to its measurement rate of up to 2.8 million measurements/s, each part can be scanned in approximately 10 minutes, allowing for rapid data collection without compromising quality.
Scanning Results and Analysis
The results obtained from using the SIMSCAN 42 were transformative for the client. The enhanced scanning process not only provided complete data sets but also ensured that the geometric details were accurately represented, particularly the sharp edges and intricate designs of the turbine blades.
This newfound precision allows for reliable reverse engineering and quality assessments, marking a significant improvement over previous methods.
Conclusion
The integration of Scantech’s 3D scanning technology has revolutionized the inspection processes for our client, addressing long-standing challenges and enhancing overall efficiency.
As the marine engineering industry continues to advance, embracing innovative measurement solutions like the SIMSCAN 42 will be critical in maintaining competitiveness and ensuring product excellence.
Through this collaboration, our client is better equipped to meet the demands of modern shipbuilding, paving the way for a new era of precision engineering in the maritime sector.


