CAPPS 2025 Multi-Sensor Metrology Software Enhances Measurement Precision and Efficiency
Applied Automation Technologies (AAT) has announced the latest release of CAPPS 2025 Metrology Software. This new version introduces a host of enhancements aimed at improving user experience, streamlining reporting, and optimizing measurement processes. CAPPS 2025 is set to revolutionize metrology workflows across industries with a strong focus on precision, efficiency, and user convenience.
Unified Dialog For Analog, Laser, and Tactile Sensors
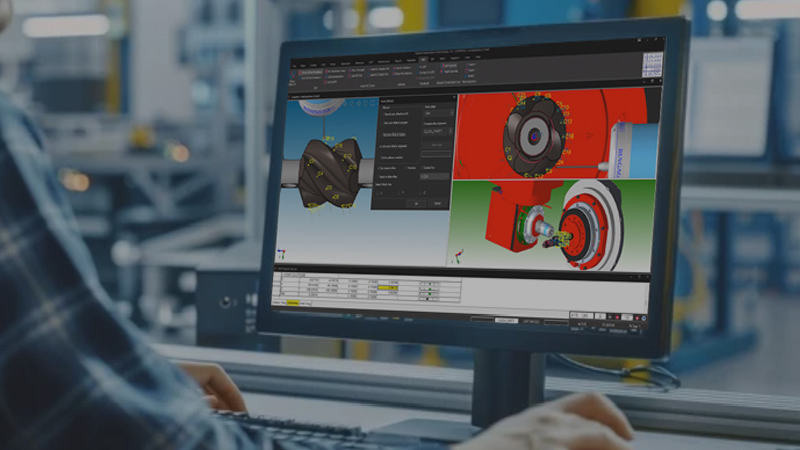
The latest release significantly enhances curve and surface scanning and reporting functionalities. Users will benefit from an improved workflow for curve measurements, with a unified dialog for Analog, Laser, and Tactile sensors, making scanning operations more intuitive and efficient. The ordering of path points has been optimized with advanced distance sorting and reversing, ensuring smooth and logical data collection. Enhanced simulation tools allow users to preview scans before finalizing them, reducing errors and improving accuracy.
Additionally, the software now enables multiple scan paths to be merged into a single scan, providing greater flexibility in data acquisition. Users can generate scanning paths directly from CAD models, previously recorded paths, or through live machine interfaces. The smart optimization feature prevents points from clustering too closely together, ensuring cleaner and more precise scans. The continuous motion blending for analog scanning has been refined with arc approach and retract movements, while advanced filtering techniques help eliminate noise and vibration effects. Multi-axis scanning now supports linear and table rotations, allowing for greater adaptability in complex measurement tasks. Furthermore, nominal curves can be created for multi-axis analog scanning, improving efficiency in high-precision applications.
Refined User Interface
The user interface has been significantly refined to enhance accessibility and ease of use. Additional control options have been introduced in the Tolerance dialog, giving users more flexibility when setting and editing tolerances. Many ribbon menus, including those for Probe and Template tools, have been redesigned with a fresh, more user-friendly layout. Accessing component details within the Probe Builder is now more streamlined, and probe model file locations can be configured to suit individual needs. The Recall Alignment and Select Sensor dialogs have been improved for better usability, and status messages are now clearer when saving reports to PDF or Microsoft Access, ensuring users are always informed about their actions.
Reporting and GD&T functionalities have also been significantly upgraded. The new release introduces support for assigning Balloon Numbers to individual characteristics, making it easier to organize and track measurement results. Templates now remain functional even when associated features are hidden, providing greater flexibility in report customization. High-definition image resolutions are now available for graphics capture and save commands, with improved text and icon quality ensuring clear and professional report visuals. The speed of capturing HD report images has been enhanced, and a notification system alerts users before sending a print job if the printer is offline or unable to print. Edge points EPROF output has been added to the Form/Profile dialog, and datums for True Position, Composite True Position, and Profile can now include workplanes beyond just the XY plane, offering greater versatility in GD&T applications.
Part Compensation Feature
Another major advancement in CAPPS 2025 is the introduction of part compensation features. Users can now compensate for part deflection caused by clamping, an especially valuable feature for CAPPS-NC users. This capability allows for deflection calibration on a CMM, with the corresponding corrections applied directly to CNC operations, leading to more accurate machining results.
Machine interface improvements further expand the software’s capabilities. The configuration process for DEVA controllers has been simplified, including enhanced support for analog scanning. Multi-axis scanning is now more efficiently managed, especially for machines equipped with complex table motion systems. Support for intricate machine kinematics, including U, V, and W staged machine-axis motion, has been enhanced. A new macro has been introduced in CAPPS-NC to manage UVW movement, alongside another macro designed to handle TPC/Traori head motions, particularly for machines with non-orthogonal head kinematics. The software also provides improved head indexing, ensuring optimal probe alignment for tilted heads and multi-axis setups, such as mill-turn machines. Additionally, support for dual-pallet and dual-spindle machines has been expanded, making CAPPS 2025 a powerful tool for complex machining operations.
The CAPPS 2025 release marks a significant step forward from the CAPPS 2024 R2 version announced in August 2024. With a strong focus on precision, efficiency, and user convenience, CAPPS continues to lead the industry in metrology software innovation.

